Write work instructions
Write or generate the steps a technician follows at setup, add photos, print the instruction and see how the tablet shows it.
A work instruction (WI) is the set of steps a technician follows at a machine. The engineer (Daniel Tan) writes it in the work instruction studio. The machine tablet shows it when the technician scans the machine to start setup, and the steps must be confirmed in order before the run can start.
View as text
%% title: Write a work instruction
flowchart TD
  A["Create the work instruction (Draft)"] --> B["Link it to an operation"]
  B --> C["Open the studio"]
  C --> D["Generate steps, or add them one by one"]
  D --> E["Add photos, cautions and readings"]
  E --> F["Submit for review"]
  F -->|"No steps"| X["Refused: add at least one step"]
Create the work instruction
- Open Engineering and choose Work instructions (
/engineering/steps). Choose Add. - Enter the Title, an optional Internal reference, Category, Equipment / area, Language (BM, EN or
BM + EN) and Rev. Save. The Doc no. is assigned on save, for example
WI-032, and the instruction starts as a Draft. - Link it to an operation: on the production method, choose the operation and set its Work instruction, or set it on a machine option. See Define the production method.
You can also create one from the form where you need it: choose + beside the Work instruction picker of a machine option or an operation, fill in the header and save. The step editor opens for the new work instruction straight away. When you close it you are back on the form you came from, with the new work instruction selected.
Open the studio
Open the work instruction (for example /r/WI-001). On the steps tab, Steps & images, choose
Open step editor. The studio opens as WI-001 · work instruction studio.
Work instructions
The list of work instructions with their revision and status.
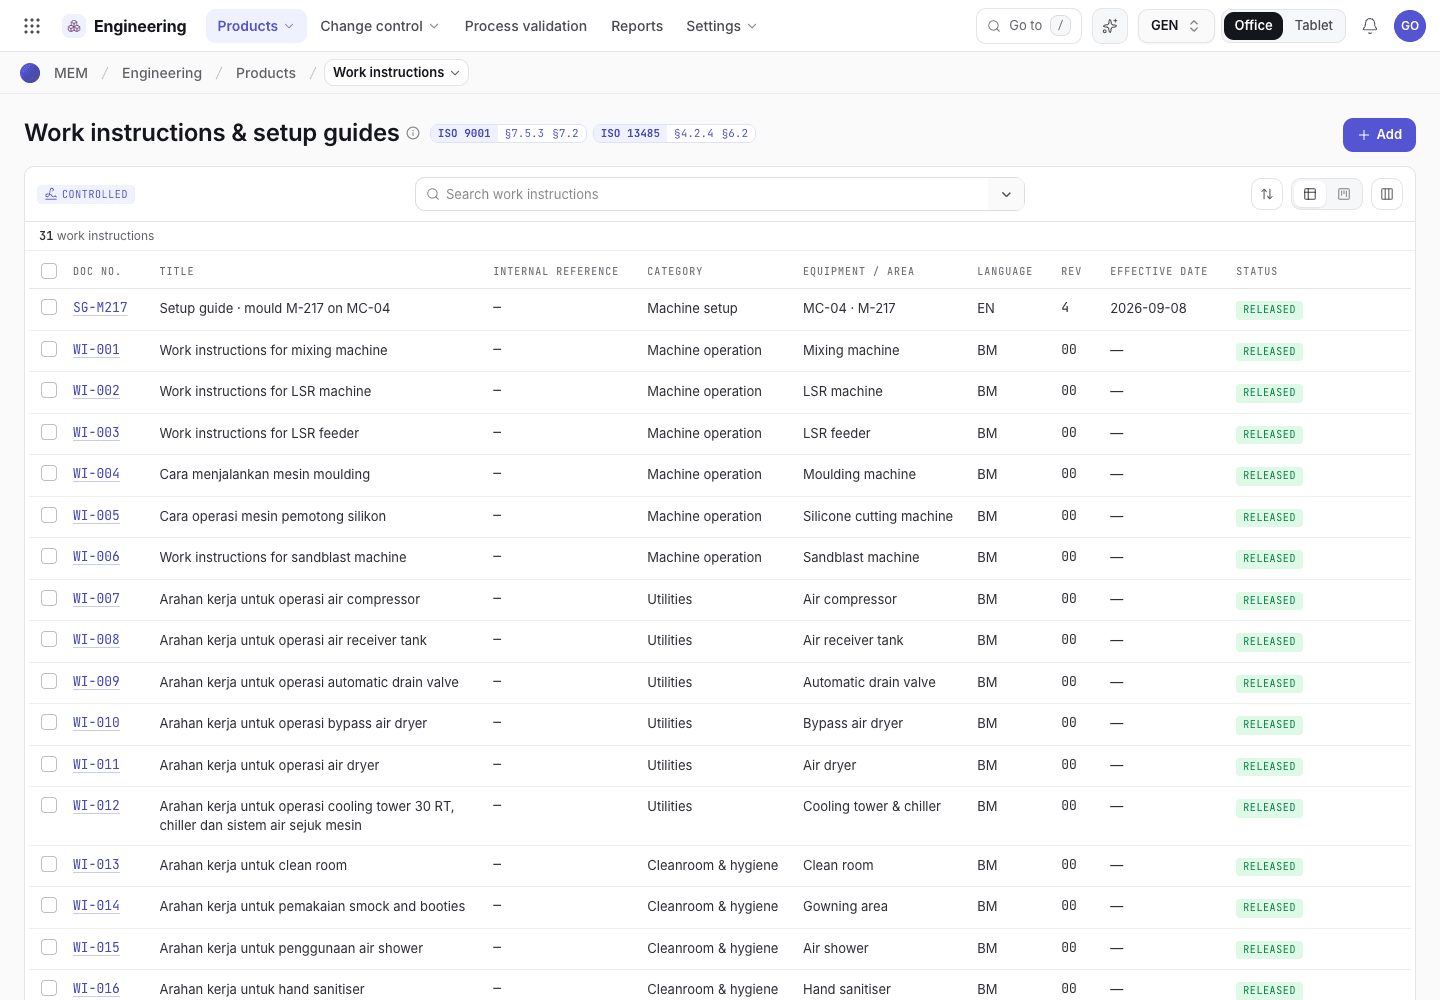
- The document number. Open one to see its steps.
- Title and category.
- Revision and status. Only a Draft can be edited.
Generate the steps from the operation
On the left the studio shows Generate from and the operation, for example OP 10 · Compression moulding. It drafts steps from the operation's station, components, machine options, parameters and
first-off checks.
- Switch on what to include: Materials, Machine & tool, Safety, Parameters, First-off checks.
- Choose Generate steps. If there are already steps, choose Regenerate to replace them or Append to add to them.
- Review every step before release. The draft is a start, not a finished instruction.
Write and edit steps
Choose + Add step. Write the Instruction and start with a verb, for example Load mould MD-217.
Add Detail if the operator needs more.
Under Technician confirms by choose how the step is confirmed: Tick to confirm, Scan or Enter value. For Enter value set the Target, Min, Max and Unit. The technician cannot move on if the reading is outside the validated range.
Add a Caution (optional), for example Hot surfaces. It shows in amber above the step.
Add a Photo or illustration: drop a photo, or choose browse. JPG or PNG; large photos are resized to 1,400 px. You can also use a page from the uploaded document. Replace image and Remove change it.
Use Move step up and Move step down to reorder, and Delete step to remove one. A work instruction always keeps at least one step.
Each change is written to the document's history. A step's photo moves with its text.
The work instruction studio
Steps on the right, generation on the left.
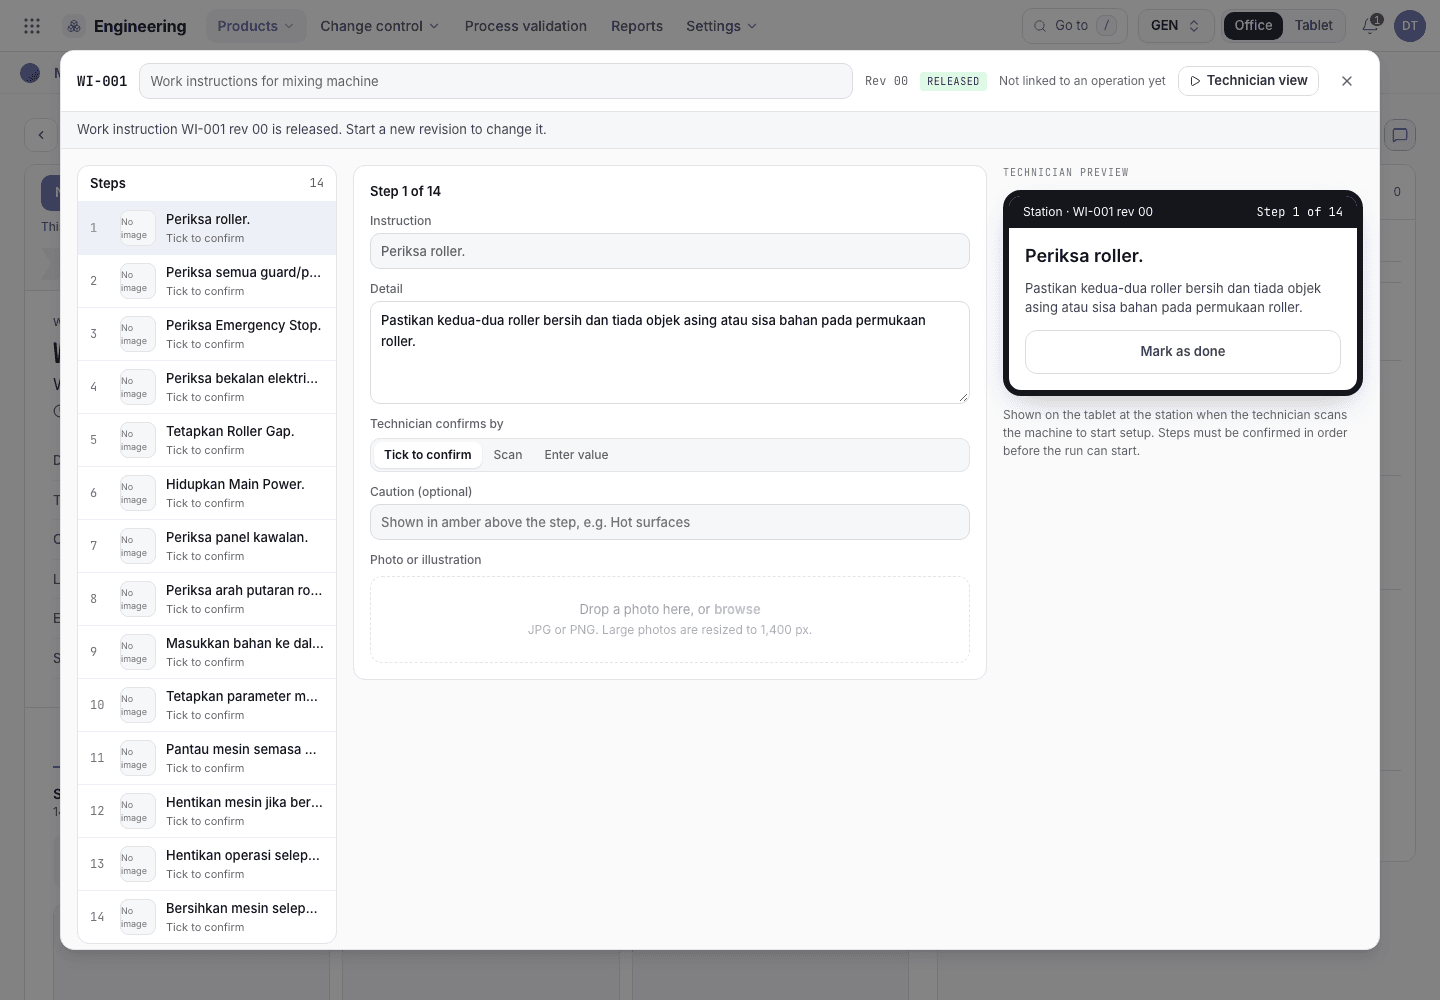
- Generate from the operation. Switch on what to include.
- The steps. Each shows its instruction, confirmation and photo.
- Edit and Preview switch the view; Technician view opens the tablet preview.
Show machine settings and checks at a step
A work instruction belongs to one operation. In the studio, under each step, Machine settings lists
the process parameters of that operation and Checks lists its inspection plan lines. Each row shows
its value, for example Barrel temperature · 230 °C (220–240), and its status.
- Select a step.
- Tick the settings and checks that this step shows the operator. Clear a tick to remove a row from the step.
- To add a row, choose Add setting or Add check. The form opens with the product, production method and operation filled in. A row that you add from a step is ticked for that step.
- To change a row, choose its edit button. The row keeps its own rules and approvals: the studio never approves a setting or a check.
A row that no step shows says Not shown on any step, so that you do not forget it. The ticks can change only while the work instruction is a Draft. If the work instruction is not linked to an operation yet, link it first: the settings and checks then show.
On the tablet, the technician sees the ticked settings and checks under the step during setup, with the values from their own records. The traveller shows the same rows on the card of each operation, so the screen and the paper copy match.
Print the instruction
On the Steps & images tab choose Print illustrated WI. If nothing opens, allow pop-ups for the
site. The printout says Controlled copy only when printed from Factory OS with the current revision.
Only a released revision prints. While the instruction is a Draft, or while a new revision is being drafted, the print sheet is switched off and says why. Releasing a new revision supersedes the copies printed at the old one, and making the instruction obsolete revokes them. See Release the product documents.
See what the technician sees
Choose Technician view in the studio. The preview shows the steps as they appear on the tablet at
the station, as Setup mode preview, one step at a time with Confirm & next, Back and Finish.
Readings typed here are not recorded. At the real machine, a reading outside the validated range shows
Outside {lo}–{hi} {unit}. Adjust and re-enter, or stop and call the setter.
The tablet preview
The same steps as the technician sees them at setup.
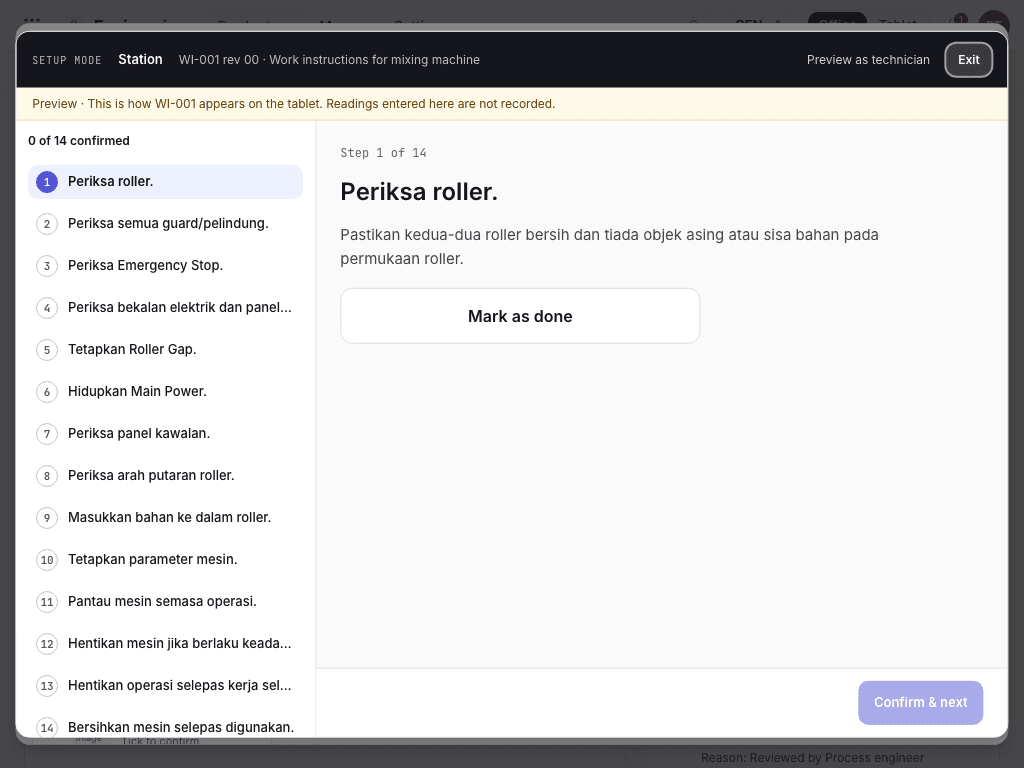
- The document, revision and the progress, for example 2 of 8 confirmed.
- The step, its photo and the validated range.
- Confirm & next moves on once the step is confirmed.
When the steps are locked
Only a Draft can be edited.
- In review: the steps are read-only. Return it to draft to edit.
- Released: locked. Start a new revision under an approved change note. The current revision stays in use until the new one is released: while the new revision is a Draft or in review, the tablet and the phone show the steps of the released revision, and the new steps appear when it is released.
- Obsolete: kept for history only.
Submit the work instruction on its record page with Submit for review, see Release the product documents.
If the system refuses a step here, see Product development: why the app refuses.
Next steps
Set the inspection planSet what QC measures at first piece and in process.Define the production method
Write the operations, machine options, moulds and process parameters a product is made with, then submit the method for review.
Set the inspection plan
Define the characteristics QC measures, who checks them and how often, and the sampling plans and reason codes behind them.