Numbering, purchase approvals and the change board
Change the prefix of each numbered document, set the purchase approval levels, and set who signs an engineering change.
Each app has a Settings page at /<app>/cfg, for example /purchasing/cfg or /engineering/cfg. It has
two parts: Documents (numbering) and, for Purchasing and Engineering, the approvals. The Org admin
(Grace Ooi) normally does this. You need full access to Settings to save. With less, the fields are read only.
Change a document prefix
Open the app's Settings page, for example /purchasing/cfg. The Documents tab shows one row for each
numbered document with Document, Prefix, Next number and Last issued.
Edit the Prefix. Use letters, digits, - and /, up to 16 characters, starting with a letter or digit.
The Next number shows where that prefix will continue. Each prefix counts on its own.
Choose Save. The message reads {n} prefix updated or {n} prefixes updated.
A new prefix applies from the next record. Numbers already issued stay as they are. Each change goes to the
audit trail. A blank prefix means the number is typed by hand and the row shows Assigned on save.
Records that the app numbers on save are on the same table after the documents above, for example
Line clearance on /production/cfg (LC-2026-), Planned downtime on /config/cfg (PD-2026-) or
supplier evaluations on /purchasing/cfg. Their Add form shows the number as Assigned on save, and their
prefix cannot be blank: the message reads {label}: enter a prefix. The system gives the number when you save. A
prefix with a year (LC-2026-) rolls to the next year by itself, and the counter goes on across years.
Purchasing settings: document numbering
One row per numbered document with its prefix, next number and last issued.
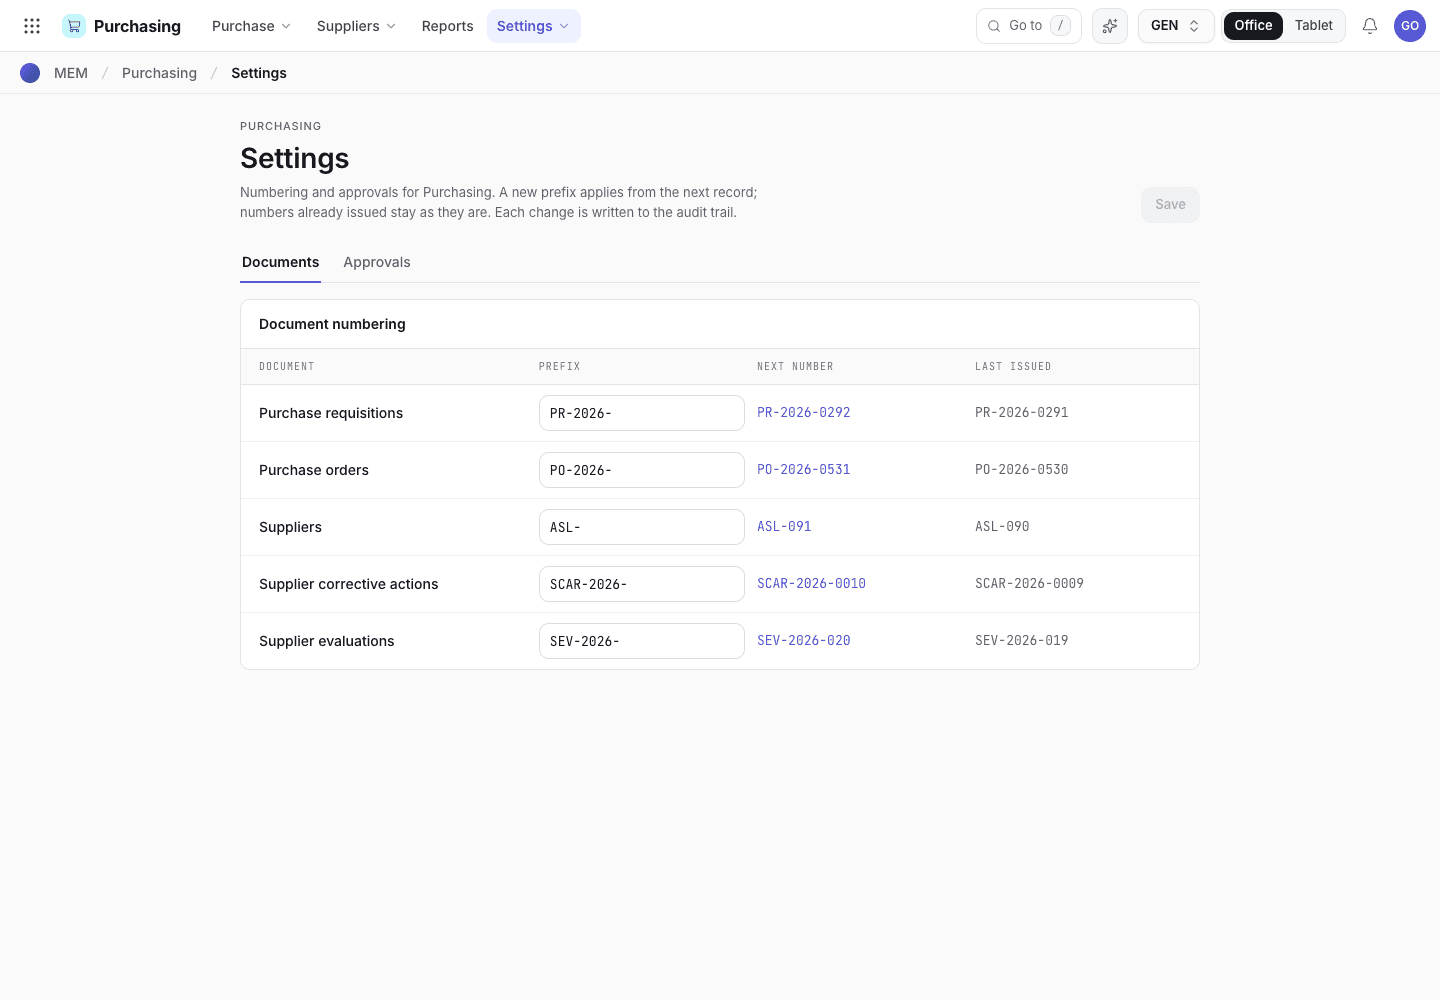
- Documents and Approvals tabs.
- Prefix field. A red border shows a prefix that is not allowed.
- Next number and Last issued.
Set the purchase approval levels
On Purchasing settings, open the Approvals tab.
Under Approval flow, choose the Signing order for Requisition and Purchase order: Sequential (levels sign one after another, lowest threshold first) or Parallel (all levels that apply can sign at the same time).
In the table, each row is a rule with Document, Purchase type (Any type, Production, Project), From value (RM), Approval level, Approvers and Rule (Any one or All). Every rule that matches the document, its type and its value applies.
Choose + Add level for a new rule, Remove level on a row, or Reset to defaults. The messages read
Approval level added, Approval rules updated and Reset to defaults.
How the levels work for the person approving is in How purchase approvals work.
Approval levels for other documents
Where a document family has a sign-off chain, its Settings page shows Approval levels. In Engineering the families are Product, Production method and Work instruction. The same person cannot sign twice. Use Add level and Remove level. A chain has between one and five levels. Changes apply to the next submission.
Each family has a Signing order. Choose Sequential (levels sign in order, from the first to the last)
or Parallel (all levels can sign at the same time). Sequential is the default, and an organization that
never changes it works as before. With Parallel, a person signs any level that is still open and that
they hold, for example the production supervisor and the QA manager approve together after Engineering
submits. The document is released when the last level is signed. The message reads
{family} · signing order: parallel or {family} · signing order: sequential, and the audit trail records
the change. A change of the levels or of the signing order applies to the documents you submit next. A document
already in review keeps the levels and the signing order it had when it was submitted, so nobody can move a
level under a review that has started. To use the new levels, return the document to draft and submit it
again.
If a review has a level that nobody can sign, for example because the person who held it left, return
the document to draft and submit it again. The signatures already given are dropped.
Set the change board route
On Engineering settings, Change board route sets who signs an engineering change note and when each function is required. Choose Sequential (each function signs in the order listed) or Parallel.
Each row has a Function, an Approver and Required when: Always, Risk high, Regulatory impact, EHS impact, Customer approval required, Revalidation needed, or a Type (Product, Process, Material, Mould / tooling, Document, Supplier). Use Move up, Remove and + Add function. The route applies to change notes sent to the board from now on. Notes already in review keep the route they were sent with.
Engineering settings: change board route
Functions, approvers and the condition that makes each required.
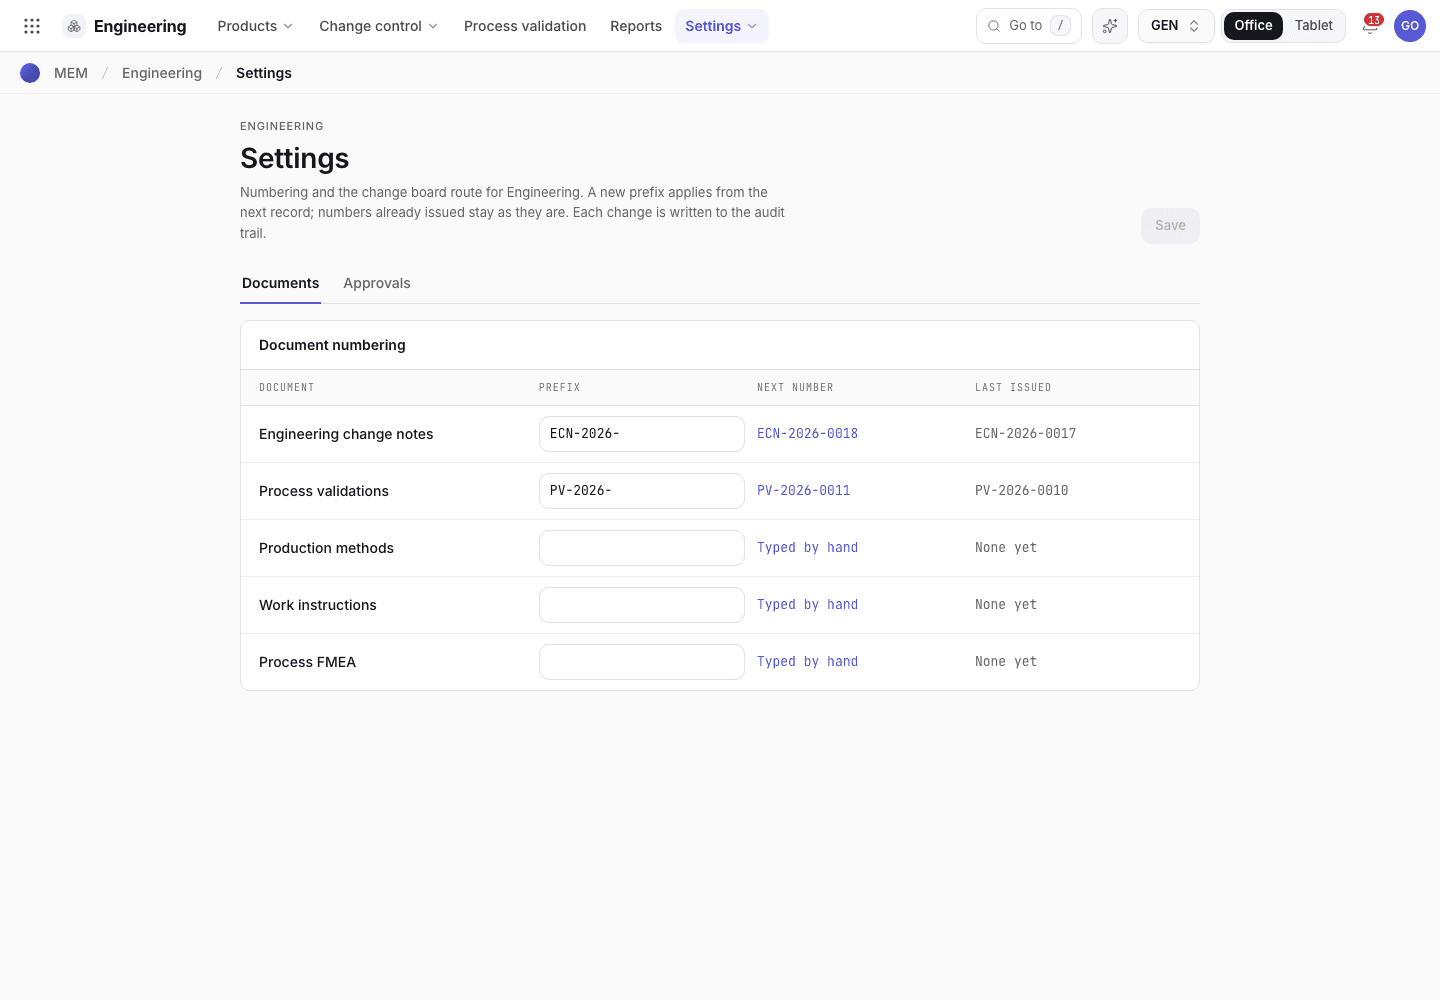
- Sequential or parallel signing order.
- Function, Approver and Required when for each row.
- + Add function.
Full access to Settings is not signing authority. You cannot add, move or change a level you can sign yourself, and you cannot leave a chain with only levels you can sign. Another administrator makes the change. This also covers levels that people you sign for by delegation hold.
If the system refuses
Every message is in Settings refusals.
| Message | What to do |
|---|---|
Letters, digits, - and / only, up to 16 characters. | Fix the prefix. |
You cannot add or change a purchase approval level you can sign yourself (...). Ask another administrator. | Ask another administrator. |
You cannot add or move a level you can sign yourself (...). Ask another administrator. | Ask another administrator. |
Each purchase approval level needs its own id. | Reload the page and try again. |