Issue material to an order
Pick the lots the system suggests, scan them at the bins, issue them to the machine and return what is not used.
The store pulls material for a manufacturing order from stock. The default role is Store (Farah Hanim). Open Inventory > Material issue. The list is called Pick lists and shows each order with material to pick.
View as text
%% title: Issuing material
flowchart LR
  A[1 Acknowledge] --> B[2 Start pull]
  B --> C[3 Scan lots]
  C --> D[4 Issue to machine]
  C -->|Lot not available| E[Skip lot or raise requisition]
  E --> C
  D --> F[Return unused material]
Issue material to an order
The system works out the quantity as bill-of-materials quantity times order quantity plus a 2% scrap allowance. It only offers lots that are Released, not expired, with enough shelf life left, and not customer consignment of another customer. Each item follows its picking rule. FEFO takes the earliest expiry first and keeps the item's minimum days of shelf life at issue. FIFO takes the oldest received lot first.
Open the order, for example MO-2026-1131. The header reads "1 Acknowledge the task · 2 Start pull ·
3 Scan lots · 4 Issue". Choose Acknowledge. It records your name and the time. No stock moves yet.
At the bins, choose Start pull.
For each suggested lot, scan the lot label or type the lot number in Lot code, then choose Scan lot. The button stays off until a code is entered, and a lot that is not on the pick list is refused. The header counts "{n} of {total} lots scanned". The table shows Lot, Bin, Received, Expiry, Left, Available and Pick.
When every lot is scanned, choose Issue to {machine}. Lot quantities drop and an Issue movement is posted for each lot, and the issue is signed in your name. The page reads "Material issued to {order}".
Material issue on the desktop
The pick list of an order with the lots to scan.
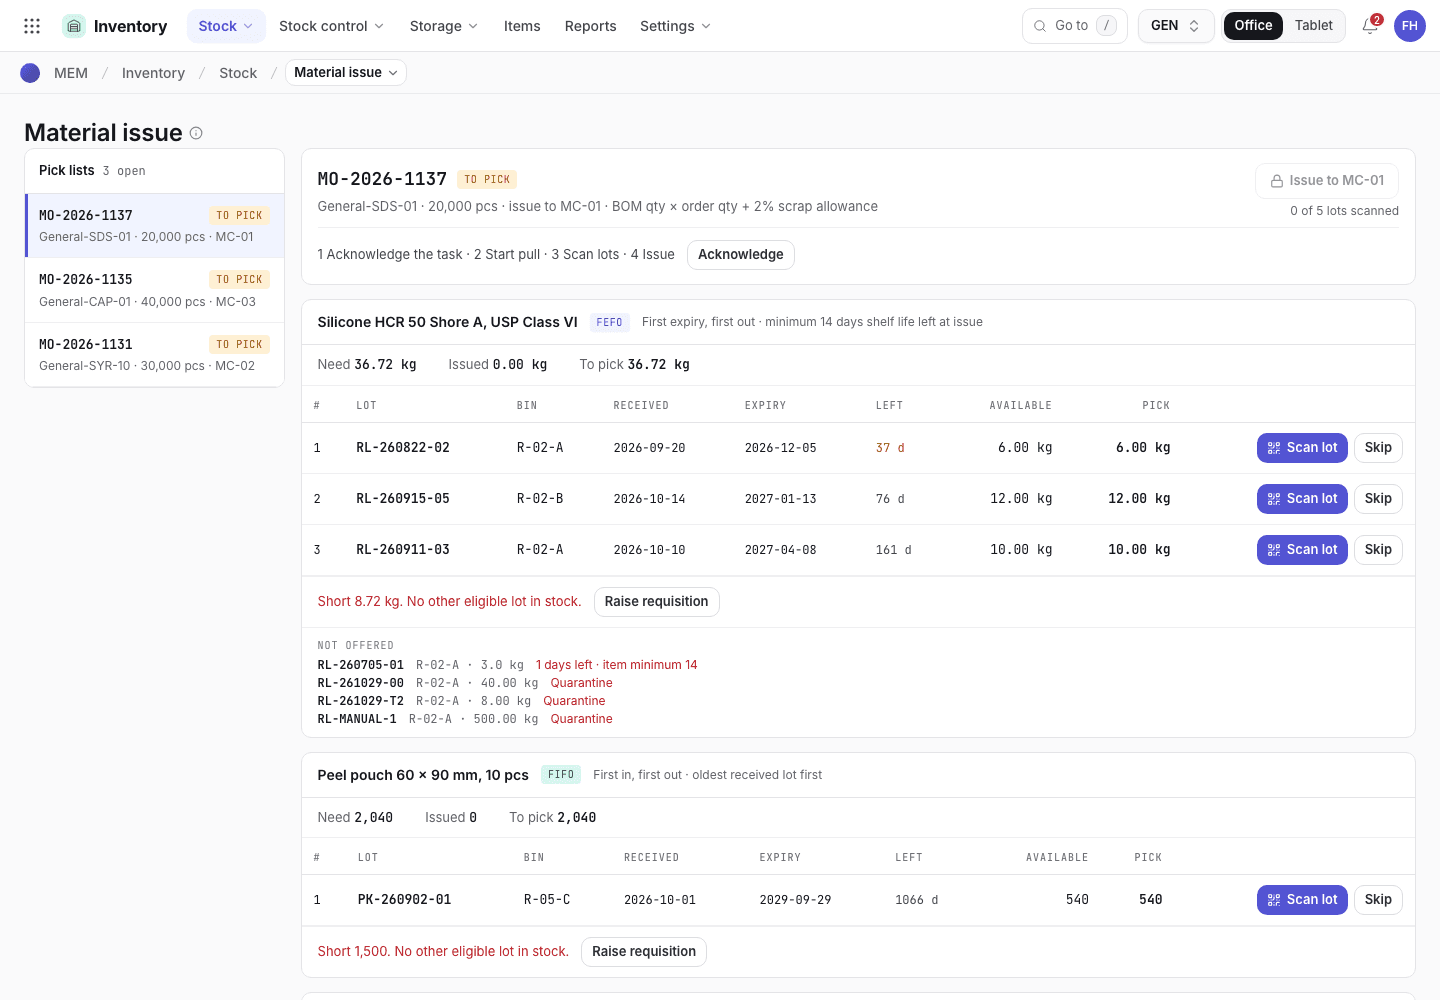
- Order and the four steps.
- Suggested lots with bin, expiry and Pick.
- Issue to the machine once every lot is scanned.
Material issue on the phone
Scan at the bins with the 375 px layout.
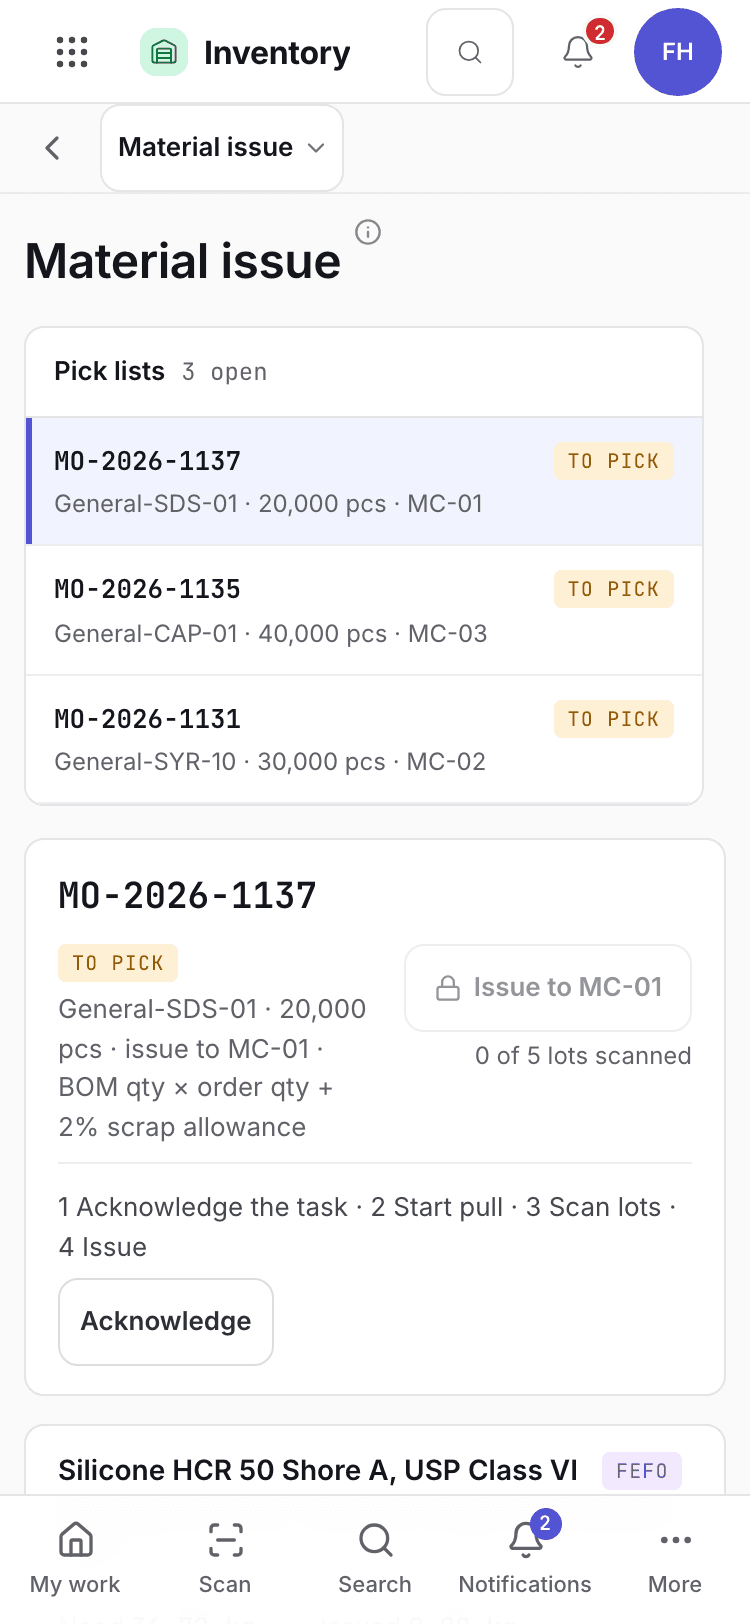
- Order and progress.
- Scan lot for each suggested lot.
- Issue button.
Skip a lot
If the suggested lot is damaged or cannot be found, choose Skip. The dialog reads "Skipping the {rule} choice is a deviation. Reason *". Write the reason, for example "Container damaged, lot not found in bin", and choose Skip lot. The system logs it and offers the next eligible lot.
When there is not enough stock
A line that no lot can cover reads "Short {qty}. No other eligible lot in stock." Choose Raise requisition. A purchase requisition is made, needed in seven days, and the line shows "{pr} raised". The pick stays open: you can Issue available to {machine} for what is in stock, and issue the rest later. Planning is told about the shortage.
Return unused material
Open the order. Under the issued lots, find the line. The columns are Lot, Item, From bin, Rule, Issued, Returned, Issued at and Return.
Enter the quantity in Return, from 0 up to what is not yet returned, and confirm. The page reads "{qty} returned to {lot}".
The material goes back to the same lot and bin and keeps its received and expiry dates. The system posts a Return movement.
Block an expired lot
On the shelf-life screen, Expired lots are never offered on a pick list. Choose Block lot so nobody moves or issues them by hand, then raise an NCR for disposal.
If the system refuses
Messages shared by every flow are in Signatures and refusals. Pick-list messages are in Planning refusals. Examples:
Acknowledge the task first.andStart the pull before scanning lots.{lot} is not on the pick list for {item}.{n} of {total} lots scanned. Scan every lot before issuing.